
First Birthday Party Ideas for Girls
How to plan a great party without going crazy or broke!
** This post contains affiliate links and I will be compensated if you make a purchase after clicking on my links. As an Amazon associate, I make a small commission on qualifying purchases. I appreciate your support!
My baby turned 1 a few days ago and I’m in total shock! I’ve been an emotional mess these days but I wanted to share with you how I created a beautiful little party for her without breaking the bank or stressing out.
Due to the pandemic, we sadly didn’t invite guests, but we still wanted to make it special for her.
I am no stranger to planning birthday parties since I have celebrated almost every birthday of my 5-year-old. Over time I have gotten a good sense of how to keep spending to the minimum but still make it cute.


These tips can apply to any party: baby showers, bridal showers, birthdays, graduations, etc. I will discuss exactly how I planned each part, how long it took, and everything I purchased.
I divided this post into 3 parts:
Part One: Planning
The first thing to do is a plan of course! I started planning one month ahead to make sure I had enough time to buy what I needed. If you are planning a bigger party, I would recommend planning at least 2 months in advance.
Budget
First, start by determining how much you want to spend; I usually have a budget of around $200 plus extra if booking a photo shoot.
Decide what you want to buy and DIY
This part goes hand in hand with the budget. Will you buy a cake or make your own? Will you book a photo shoot or do it yourself? Will you make the food or buy it? Do you have supplies from previous parties? What do you want on your cake table?
Ask yourself all these questions to get a better idea of what you need to buy and how much you will spend.
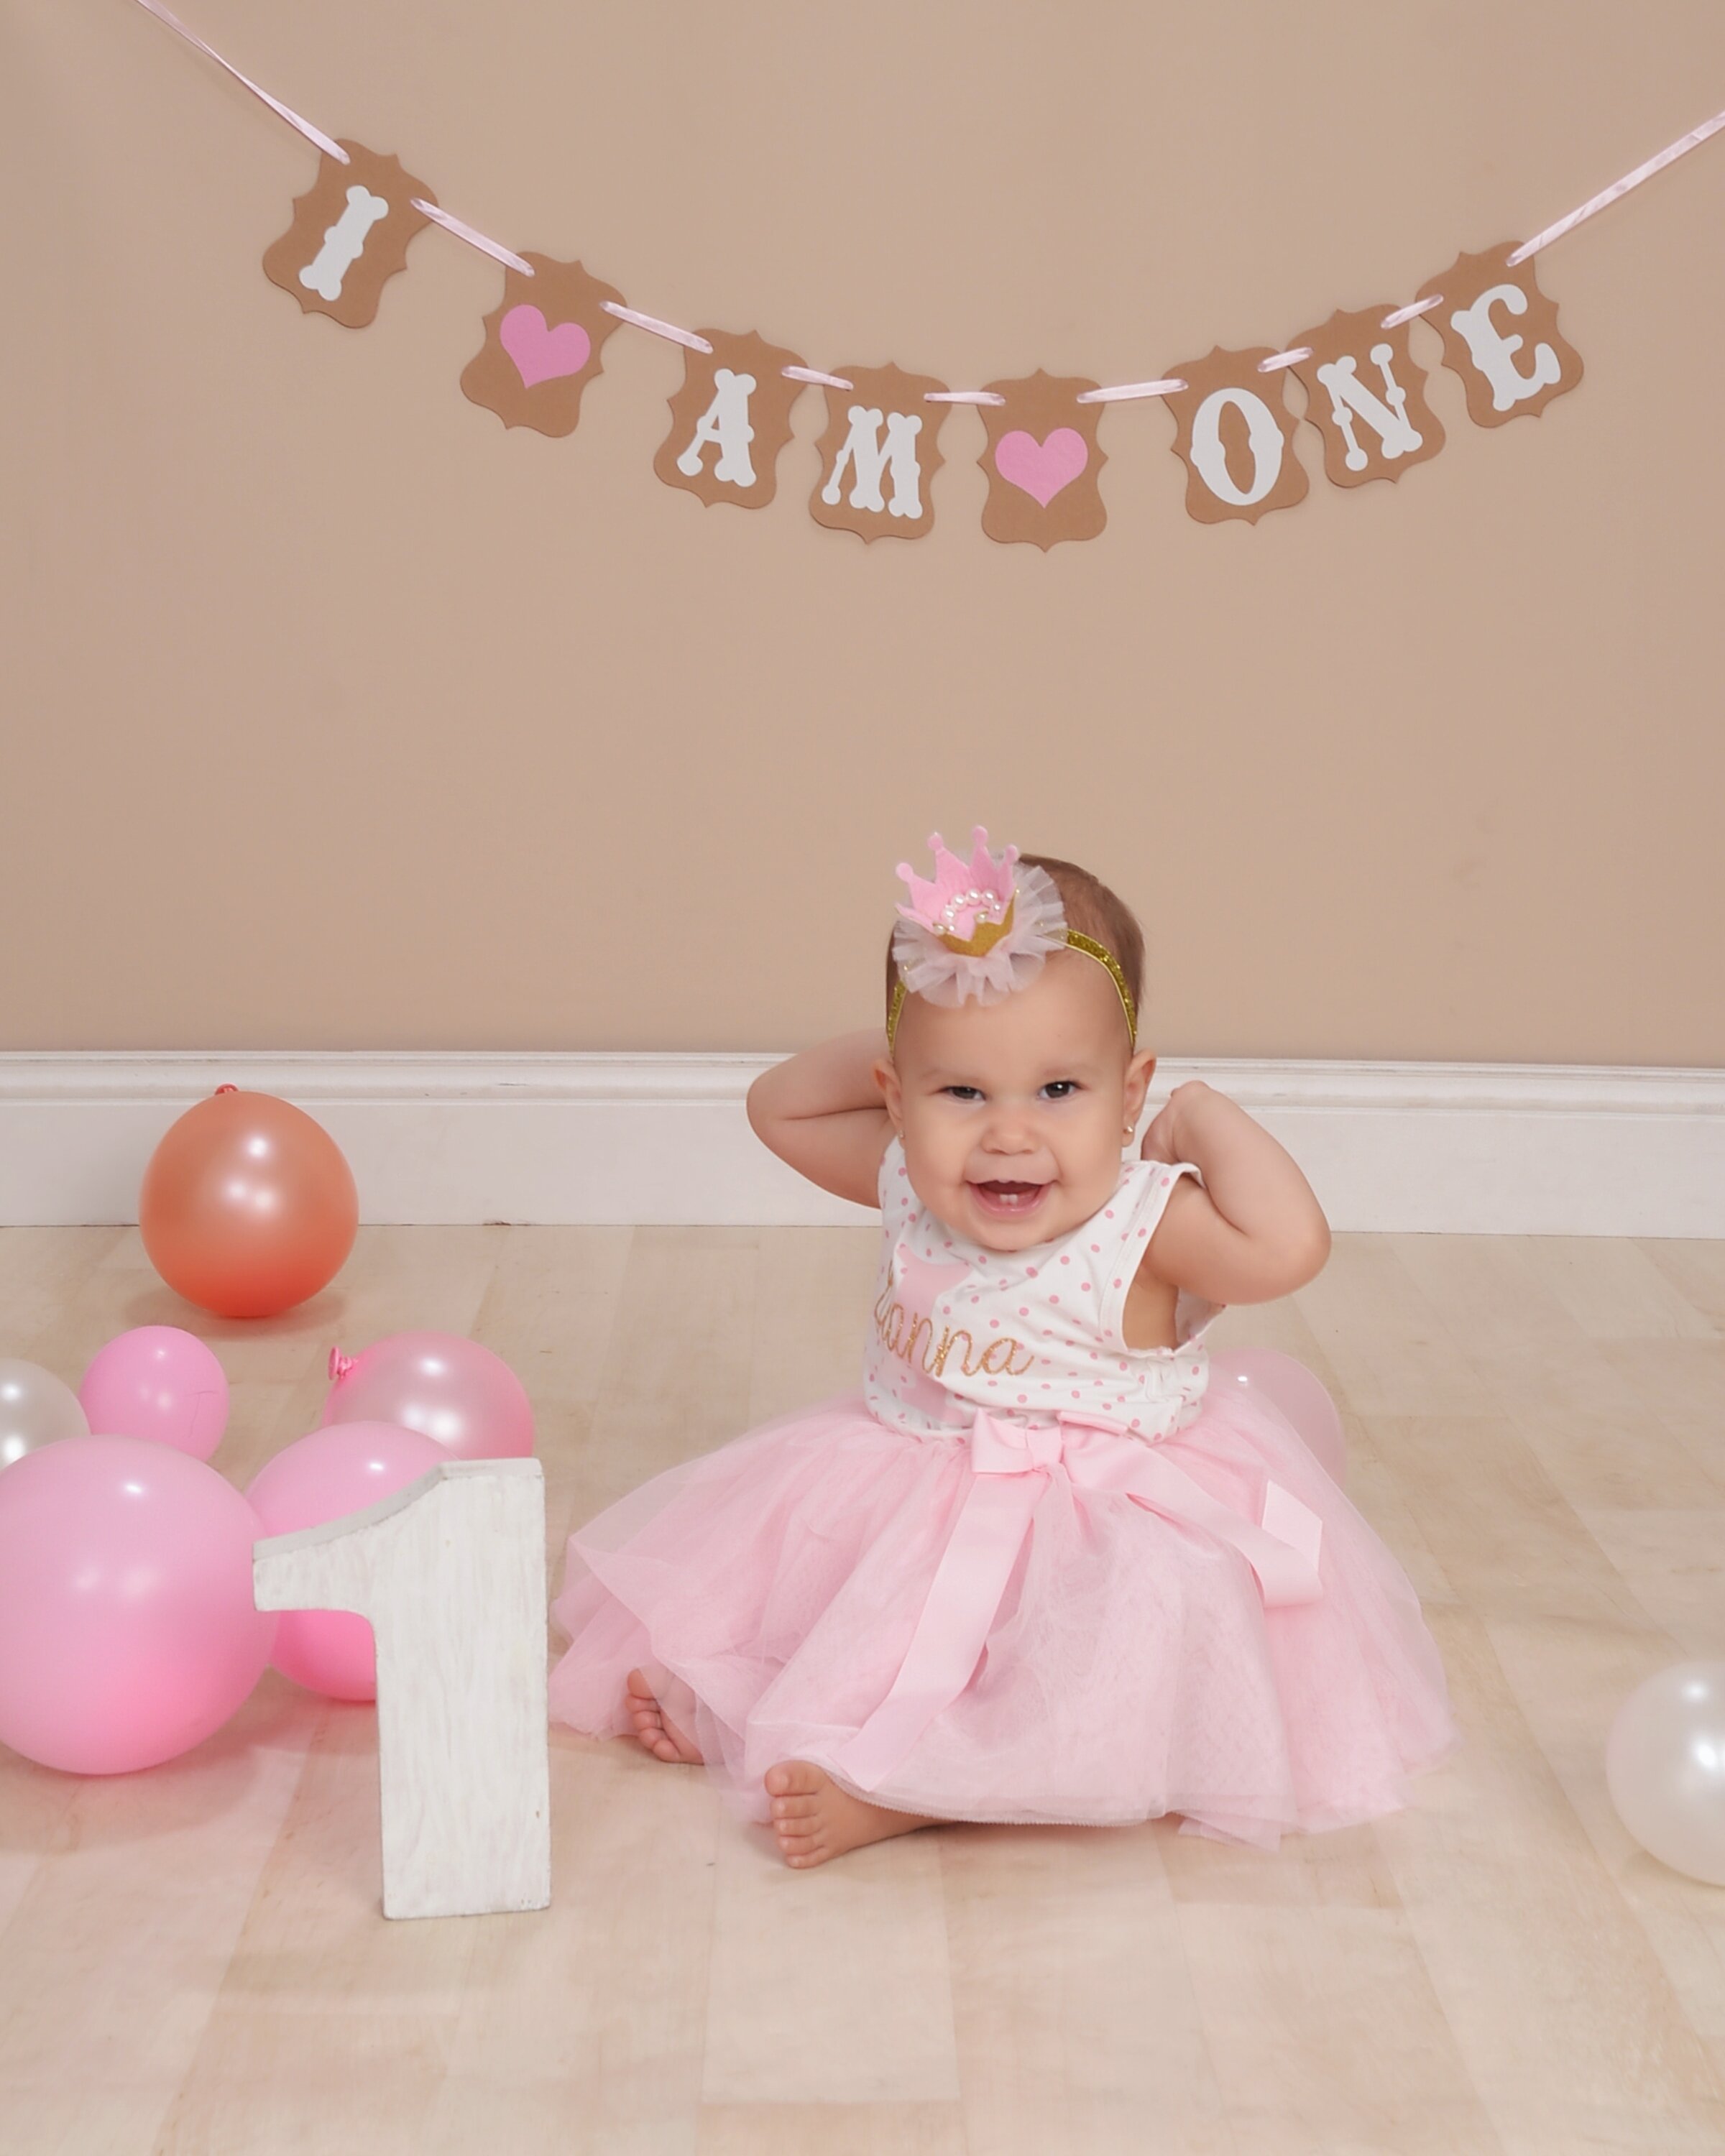
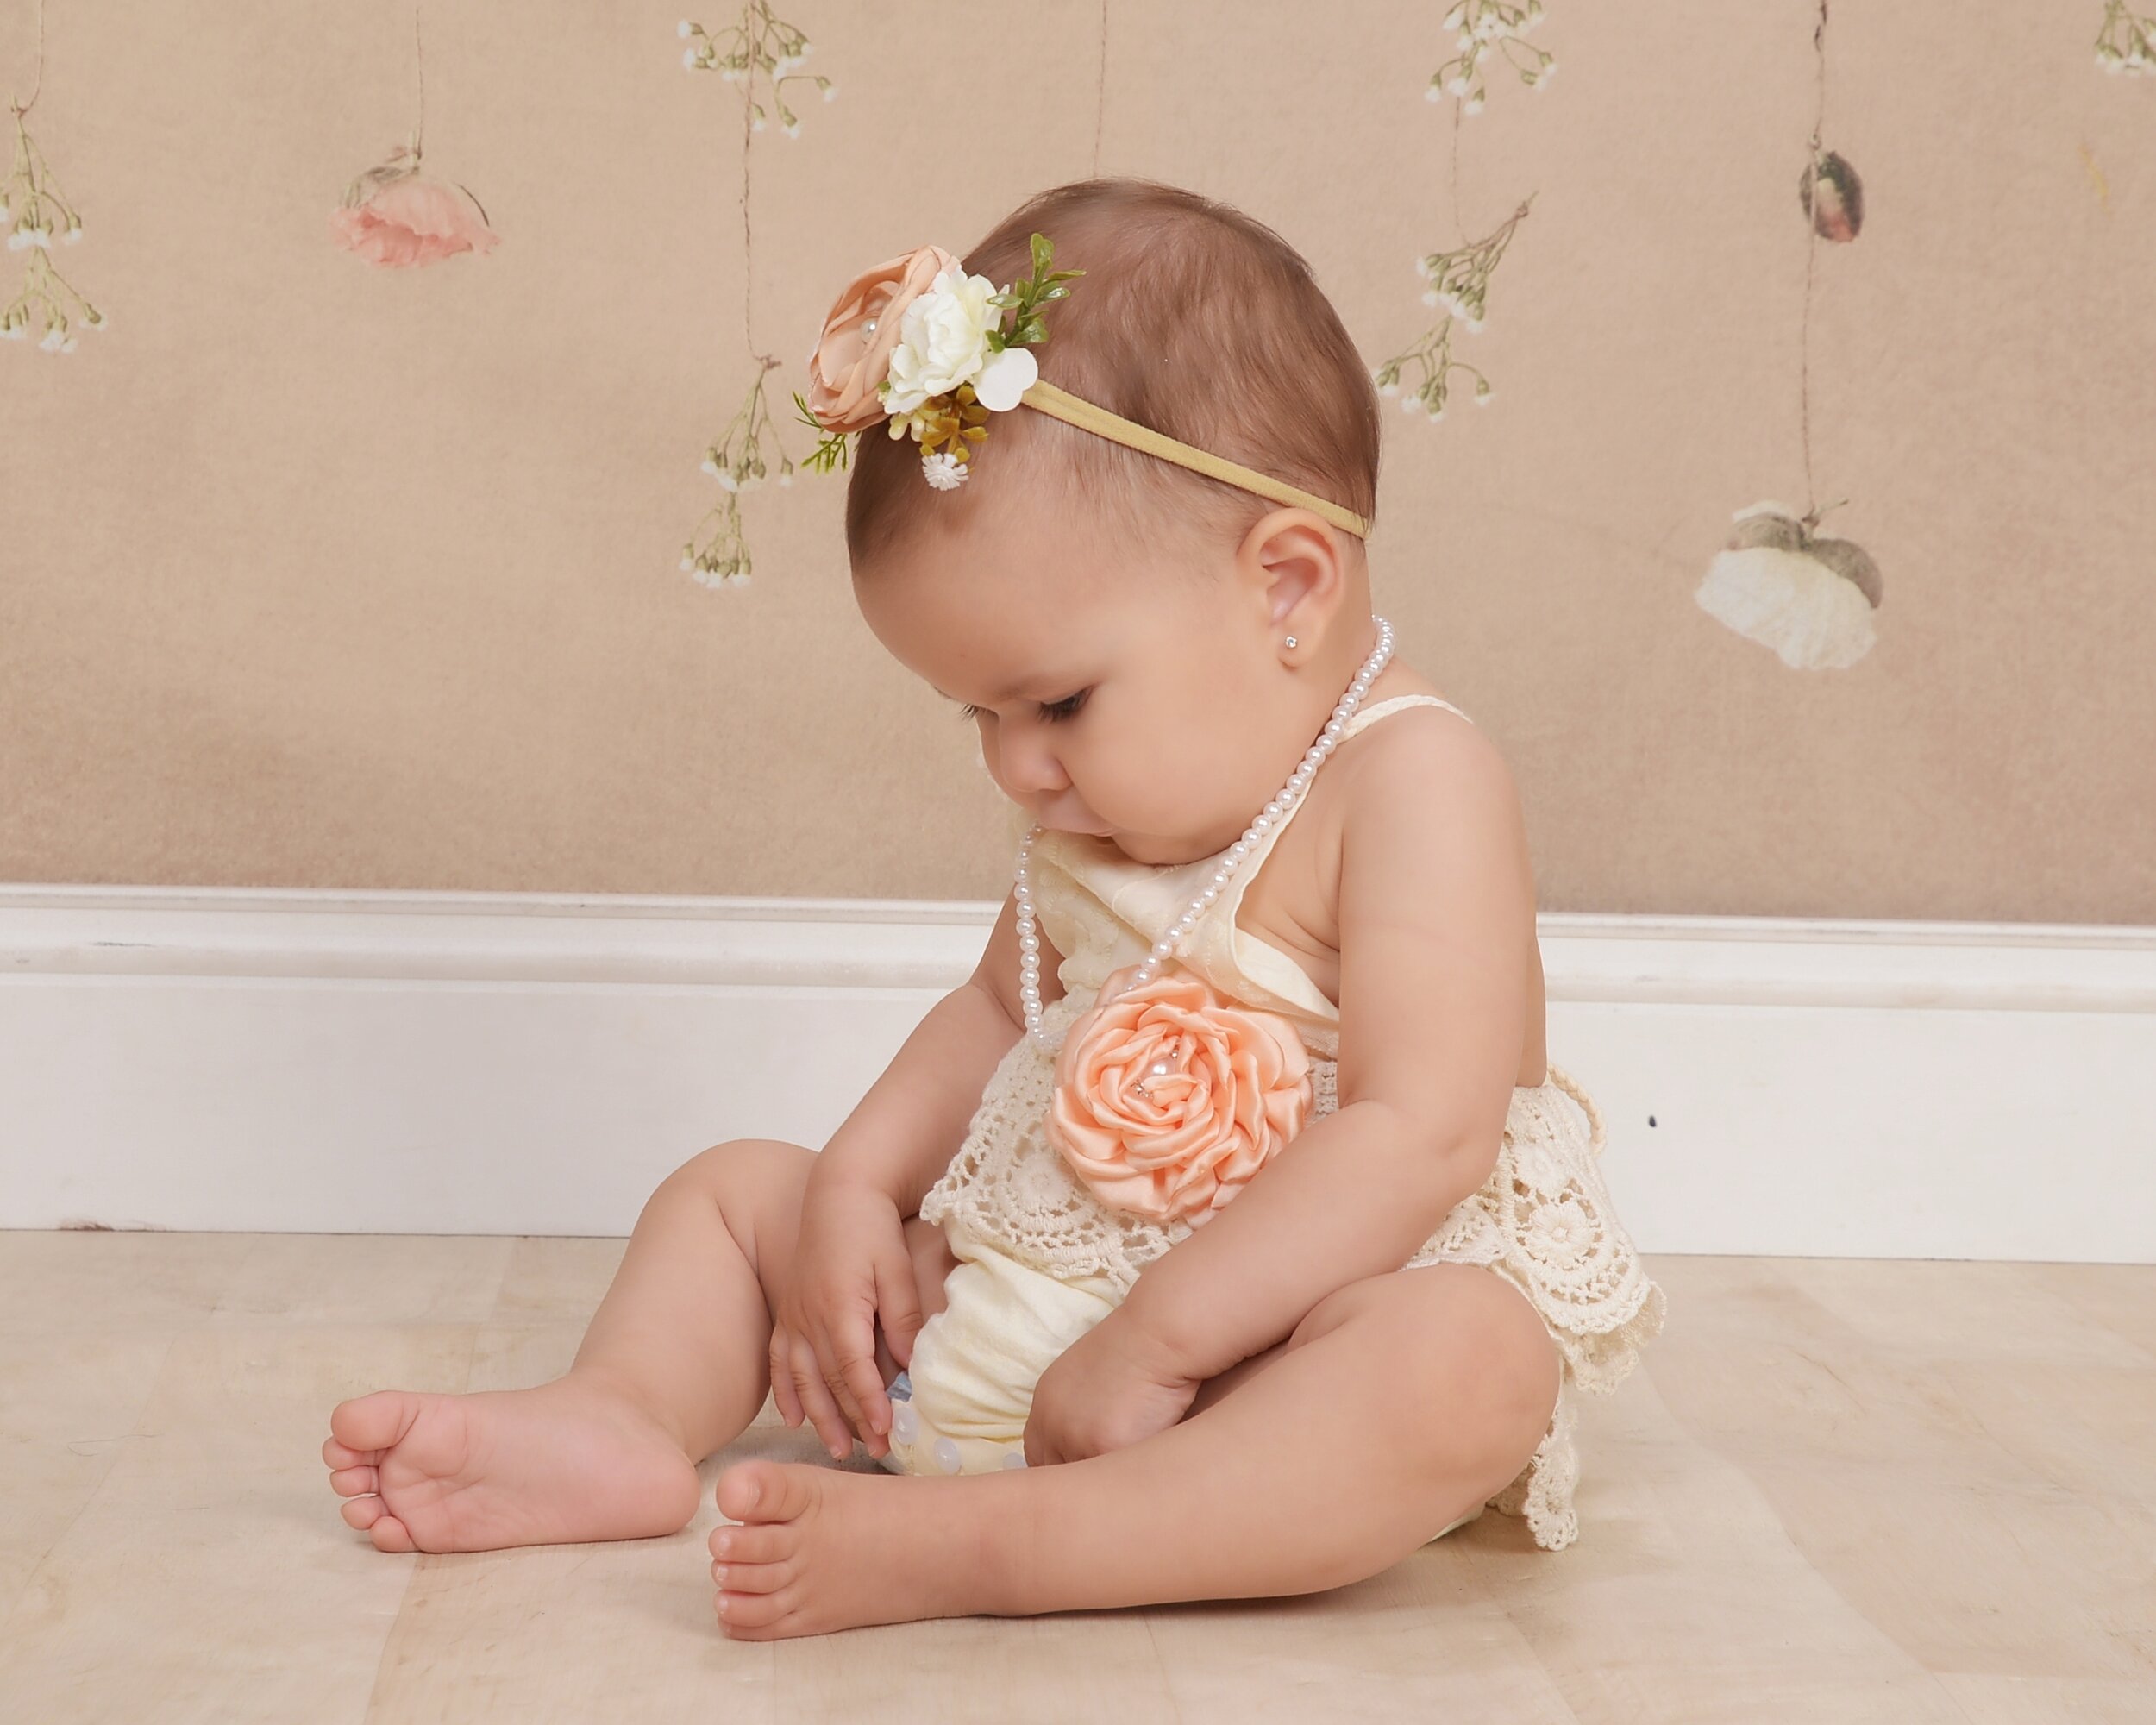
Book a photography session (depends on the type of party)
I booked our session a month in advance, but if your photographer is busy you might want to book earlier. We chose to use JCPenney Portraits because we used them before for our oldest daughter’s pictures. If you want to save some money, I highly recommend them.
Color scheme or theme
Pick what colors you would like to use or a specific theme. If you pick a theme sometimes the decorations can be a little more expensive. I wanted to do a Blue’s Clues theme for her birthday, but I couldn’t find many decorations and the ones I did find were a little expensive.
Create a Pinterest board
Create a Pinterest board and start saving ideas on what you want for the party: decorations, food, treats, outfits, etc.
Plan your menu
If having guests, you need to feed them! I recommend one of the following to save money:
Make a pasta dish like lasagna or baked ziti. Pasta feeds many people and is quite cheap. You can serve with salad and breadsticks.
Do a potluck! Have your closest family or friends bring a dish and you won’t have to worry about the food at all, just maybe some chips or appetizers.
Order Pizza! It’s delicious, cheap and almost everyone loves it.
Also, you’ll need drinks, buy large packs of juice boxes and small waters in places like Costco or BJs.
Make lists
Make a list or make 20! I’m a firm believer in making lists, it helps me stay organized and not forget small details. I also have a huge calendar in my room where I plan out my whole month.
Part two: Buy everything you need
Now comes the fun part, shopping! Most of the things I bought were from Amazon, I also went to Party City, Target, and Dollar Tree. I bought 2 outfits for her photoshoot/party on Etsy for $63.
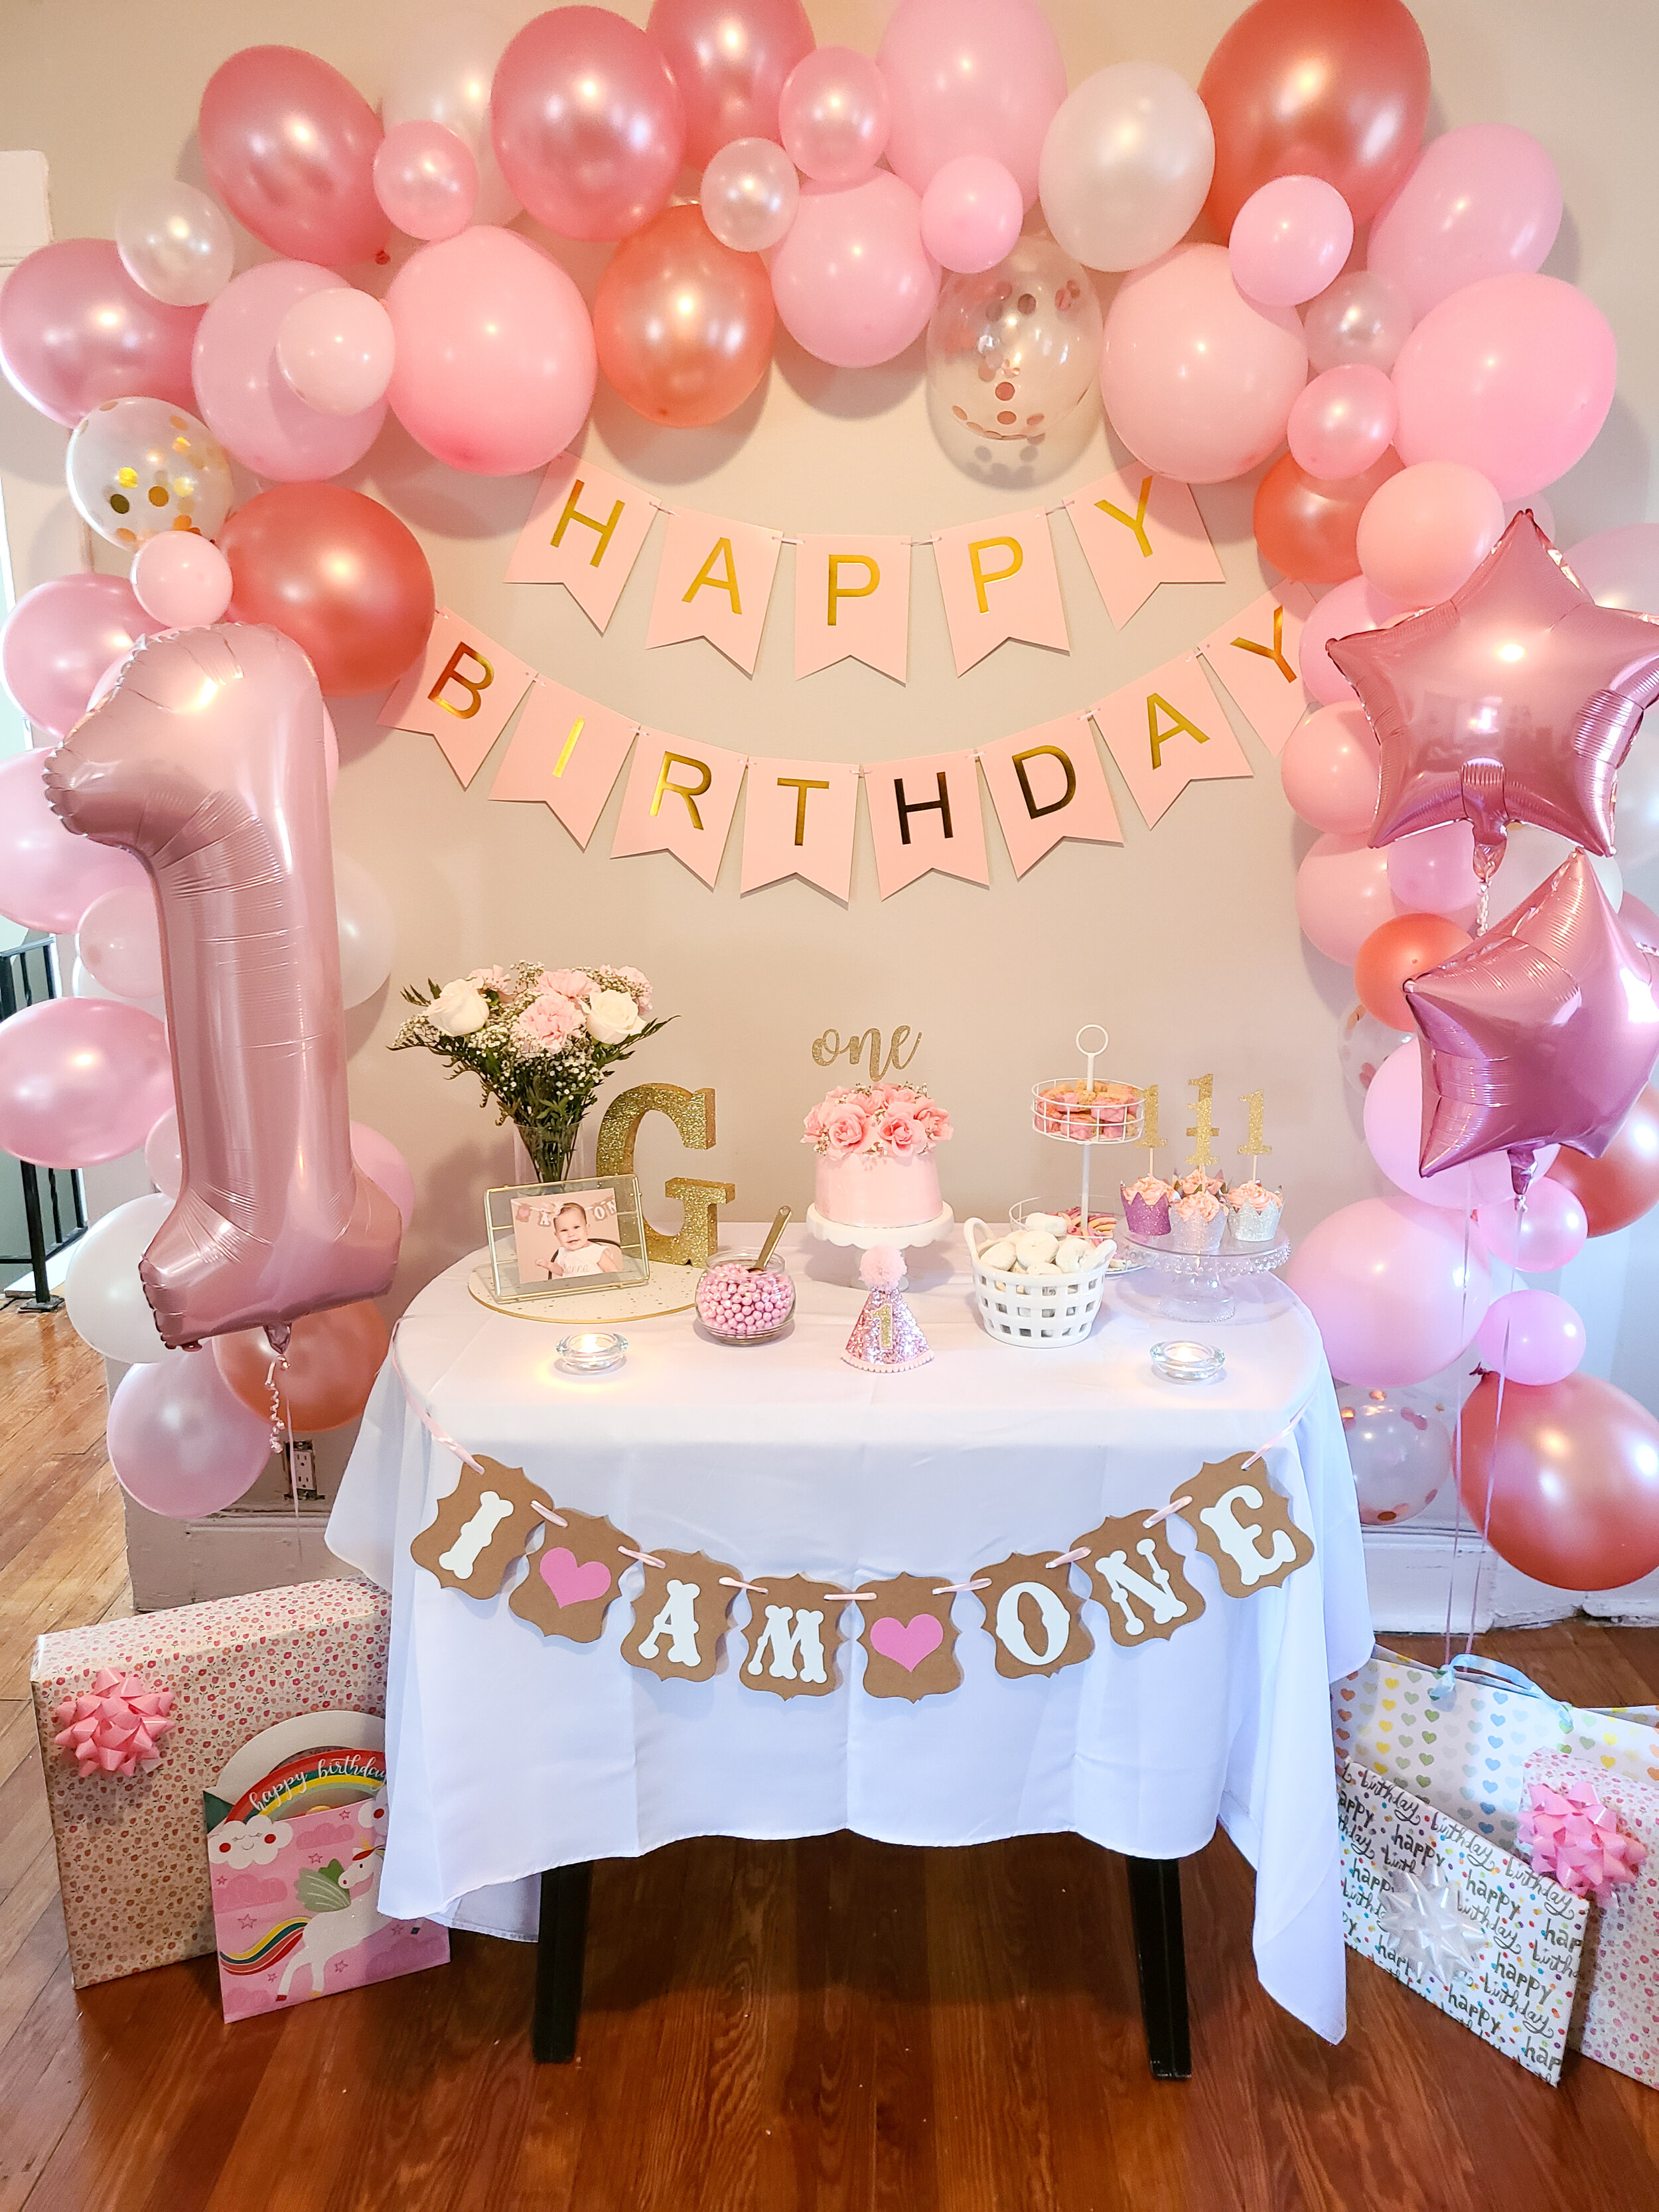
Plan out how you want to set up your table and determine what you have on hand and what you need to buy. I added different elements that I thought would look nice: flowers, candles, different treats, a picture, etc.
Amazon purchases
First Birthday decorations kit – By far the best purchase! What I really think made everything look beautiful was the balloon arch. It was a little intimidating at first but it was actually very easy.
Balloon Arch Tips
Blow up all the balloons (the kit has different sizes and colors).
Put the large and medium balloons along the strip and leave a few holes in between. At this point don’t put too many balloons.
Hang the arch on the wall with a few thumbtacks.
Start adding the rest of the balloons to the holes you left empty (except the smallest ones).
Glue the small balloons all over the arch on places that seem empty (the kit included glue dots).

Balloon pumps – If you’re making a balloon arch, do yourself a favor and buy a pump.
Tablecloth – This is a plain white polyester tablecloth. You can use also a plastic one if you wish, you can find those at Dollar Tree.
One Cake topper – This cake topper was so cute and matched my theme perfectly.
Cake decorating kit – I highly recommend this if you’re making your own cake.
5-layer cake pans – I always make a 6-inch cake to make it easy for myself. These pans make a cute small cake with many layers.
Round cake boards – If making your own cake this also comes in handy to hold the cake while decorating it.
Target purchases (in-store)
I couldn’t find links to any of these items, I’m assuming because they’re from the dollar section. I definitely recommend going in-store to see what you find.
Cake stands – I have a small collection of cake stands and I’ve bought almost all of them from the dollar section at Target. You can also find them at Marshalls or Home Goods.
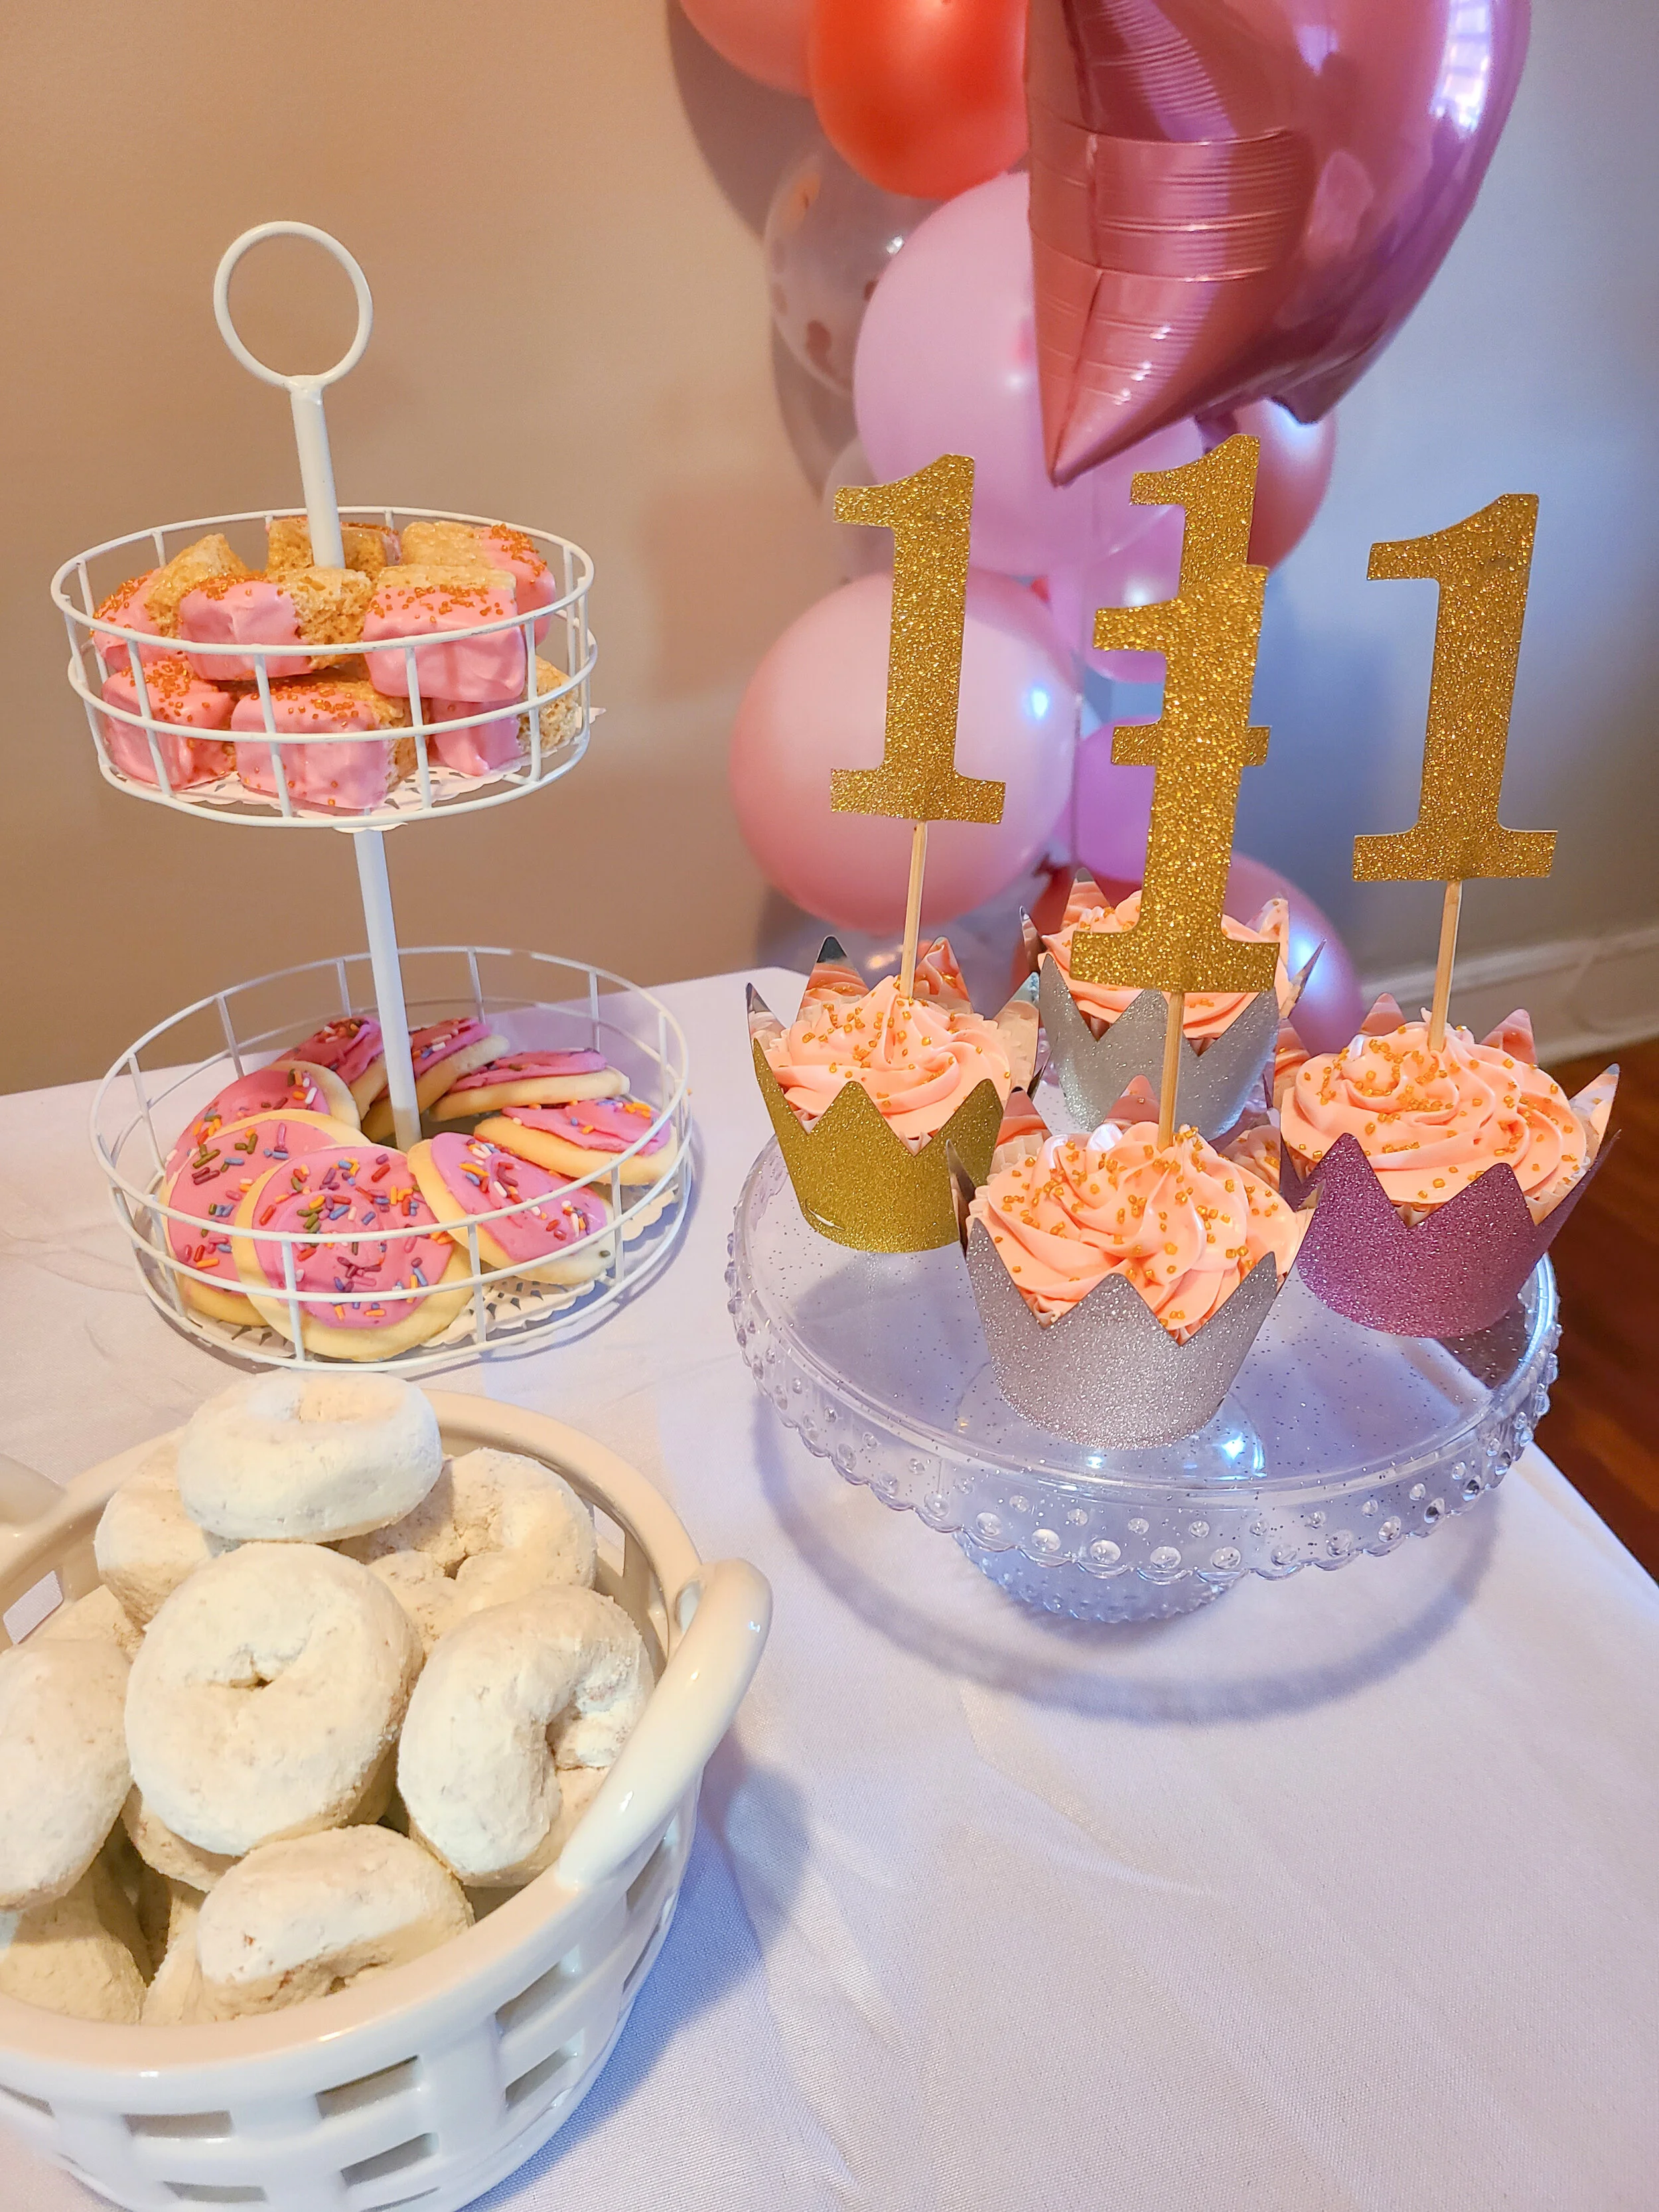
Treat stand – Another one of my dollar section finds from Target was a two-tier treat stand for only $5.
Basket – I found the little basket where I put the donuts a few years back.
Plate charger – I found the white and gold charger a few years back for only $3.
Party City
Party City can get very expensive if you buy all the decorations there, that’s why I bought the majority on Amazon. I shopped in-store but I found links to everything I bought:
Colored candy – Party city has a huge selection of different colored candies.
Party favors – You can also find cheap ones at Dollar Tree.
Candy melts – I dipped mini rice crispy treats in the candy melts. You can also dip pretzels, strawberries, cookies, etc.

Dollar tree (in-store)
I shopped in-store but I linked all the categories if you wish to shop online!
Mini crowns – I randomly found one final box of tiny party hats in the shape of a crown. I used them to put the cupcakes inside and they looked so cute. You can buy them in bulk online!
Thumbtacks – If making a balloon arch you’ll need them.
Pink plastic roses – I used them for the top of my cake (don’t they look real?!)
Part three: Prep
I started my preparations 3 days in advance and it went as follows:
Day 1: Clean the house, make treat bags, and wrap gifts.
Day 2: Went shopping for treats, bought flowers, made the food, prepared the decorations, and made the balloon arch. I also made my cake, cupcakes, and treats.
Tips to make your own cake
Make your cake the day before the party. I always make a small cake (6 inches) and cupcakes for the guests. If you can’t make your own cake but still want to save money, order the smallest size from the bakery and make cupcakes.
Allow your cake to cool completely before frosting.
If using a tub of frosting (I used the Pillsbury one), put in the fridge for a little bit. If the frosting is too smooth it will be difficult to frost the sides.
Frost your cake twice, the first time is called a crumb coating. This prevents crumbs from the cake to transfer to your frosting. After the crumb coating, I freeze the cake for about 40 minutes and then frost again.

Day 3 (day of the party): Put together all the decorations and food. Make sure you take pictures when there’s plenty of sunlight!
I hope these tips come in handy for your next party! Let me know in the comments if you have any more questions for me.